TVs have evolved over the years, and you can find modern units that are smart, slimmer, and have unique features like HDMI USB, and optical ports. Having a TV with multiple ports allows you to connect several devices simultaneously. But what could be the reasons why your TV may be having a USB port?
The reasons your TV has a USB port include connecting computer peripherals, transferring multimedia files, powering other devices like TV dongles, updating the TV’s firmware, connecting TV accessories, and playing multimedia files like movies or songs.
In this detailed guide, we will cover the following:
- Why a TV comes with a USB port.
- How to use the USB connection on a TV.
- Simple fixes for a USB port that won’t work.
Table of Contents
Formatting the USB
Sometimes you may have a USB port on your TV, but the TV may fail to recognize the external USB or hard drive. The reason for this is the wrong format. A good example is Samsung televisions that only support NTFS and exFAT systems, and Philip sets that only support drives formatted in DOS or FAT format.
To format the USB device, you’ll need to connect it to the laptop or PC. Find it in the file manager. You should note that formatting an external drive deletes all the content, which is why you may need to copy any files you need to another location.
Right-click on the drive and select format. Find the right format under the file system before proceeding to start formatting.
1. Playing Multimedia Files
One of the most common reasons why a TV is fitted with a USB port is to transfer or play multimedia files. You can hook a pen drive, a flash drive, or an external hard drive to the TV’s USB port and play your favorite songs, watch movies, or read books.
Having a USB port also allows you to view photos from the gallery of any digital media device or a hard drive. The only point to note is that the TV needs to support the multimedia formats to view the photos.
Playing Media Files Using a USB Device
To get started, you need to:
- Plug the external hard drive or USB port into a USB port at the back of the TV.
- Full HD TVs, SUHD and QLED TVs, will have a pop-up message appear that enables you to access the multimedia content list on the USB device.
- Press the source button on the remote, and choose the USB device. You can also press the home button on the remote and move to the source, Choose a connected device or USB device.
- Choose the media file you want to play.
- Press the enter button to access the control panel.
You can press the return button on the remote if you need to play another file or media saved in the USB device. That will take you to the main page.
What Else You Should Know About Playing Files
Some good examples of Mass storage classes are card readers and thumb drives. These devices need to be connected to the TV’s USB port.
On some television models like Samsung, you’ll need to use the HDD or USB port when connecting an external hard drive. The manufacturer recommends using an external drive with a power adapter. Connect any high-power input USB devices to the 5V, 1A USB port.
Sometimes a USB device may fail to be recognized when you connect it to a TV. In this case, you may need to connect the unit to a computer and format it to display the list of files available on TV. SUHD and QLED TVs support NTFS, FAT, and exFAT file systems, while full HD TVs support FAT16, FAT 32, and NTFS.
2. Transferring Files
Moreover, you can transfer multimedia files like a movie from your phone or laptop to your TV using the USB port. A flash drive or an OTG cable helps you move the files from the computer to the TV.
Transferring Files From USB to Smart TV
To get started, you’ll need to:
- Go to the Home Screen on your Smart TV.
- Scroll down and select Settings.
- Choose Storage and Reset under Device.
- Select the USB drive.
- Tap on select migrate data and choose to move now.
At this point, you can browse the USB drive like you would on a laptop. If the drive doesn’t open or play, this could indicate an unsupported format. You can get a similar file in a different format or get a conversion tool.
What Else You Should Know About Transferring Files With a USB Port
One mistake most people make is to assume that because a TV has a USB port, it can play files from any USB drive. Unfortunately, some TVs are designed for engineers to run software to repair or update the set. A few TVs can also only display video files once you enable that option in the service menu. You need to be cautious about these menus as they could interfere with the TV’s performance.
Compatibility is another thing you need to check before transferring or playing files using the USB port. You may need to check the user manual to see the format of your TV supports. Most television sets support XVID, MP4, MPG, DIVX, AVI, and WMA.
Formats like 3GPP, VOB, AND MKV are rarely supported. A few TVs will only play video in a supported format at a specific range of resolutions or a particular resolution. That means you may need to re-encode or convert some video files to watch them on your television.
Another possible limitation is that your TV may not show the files stored inside in a folder on a USB or hard drive. That’s because some sets are limited in terms of the number of filenames they can display. You may find some TVs only support USB drives of a specific range of capacities.
3. Powering Devices Like Chromecast Devices and Smartphones
You can also use the USB port to power other devices like TV dongles and smartphones. A good example is the Amazon firestick that requires a power source to function. A TV can supply 5V and 500ma of power to some devices, but this depends on the TV model and manufacturer.
4. Connecting Computer Accessories
With a TV’s USB port, you can connect computer accessories like a mouse and keyboard to your TV through the USB port. That helps if you have a smart TV with inbuilt apps like web browsers and social media. You can work from your TV by connecting a wireless or wired keyboard to the TV to set a password or scroll through different pages.
Connecting computer peripherals to your TV provides better navigation, unlike when you use a handheld remote.
To connect a wired keyboard with a smart TV, you’ll need to:
- Locate USB port 2 on the back of the TV.
- Connect the USB Keyboard with the TV via the USB port.
- Once you connect the keyboard with the smart TV, you’ll notice all the keyboard options on the TV screen.
- Use the TV remote to select the keyboard language and press return.
- Choose the keyboard type as USB and press return.
- Follow the instructions afterward, and in a few minutes, the keyboard will be connected to the smart TV.
- Once done, you should be able to type using the keyboard.
The best part is that you can also connect a wireless keyboard with smart TV if a USB keyboard doesn’t work for you. However, it would help if you had Bluetooth on your TV. If you don’t have the Bluetooth feature, you’ll need to get a Bluetooth dongle and plug it into the USB port. Once you’ve attached the dongle, you need to:
- Switch on the Bluetooth app on your smart TV or connect the USB dongle to the USB ports.
- Turn on the keyboard, which will be automatically detected if using a smart TV.
- Find an open dialog box that will ask you to activate or set up the keyboard, select OK or Yes.
- Go to the menu, settings, device manager, and click on keyboard settings.
- Add Bluetooth keyboard.
The process pairs up the keyboard with the smart TV, and you can now use the wireless keyboard effortlessly.
5. Updating the TV’s Firmware
You can update the TV’s firmware to the latest version once you connect it to the internet. Modern smart TVs also allow you to download the newest firmware software, depending on your TV model. The software is available on the manufacturer’s support website that is accessible from your PC or laptop. After downloading, transfer the files to a USB drive and plug the drive into your TV.
Switch on your TV and choose the software upgrade section. Select an update from or by USB. The TV finds the update file and begins the update process automatically.
6. Connecting TV Accessories
Another way you can use the USB port on a TV is to connect TV accessories. If you’re looking to improve your viewing experience and beautify your TV, you can get TV backlights hooked to the TV via the USB ports.
These backlights come in the form of strips that are glued to the rear of the TV. You can customize them depending on your preferences, and this includes adjusting the brightness levels, switching to different lighting modes, and other accessible features through a remote. The lights make viewing your TV easier, especially if you struggle with light.
7. Charging Your Smartphone
You can also use the USB port on your TV to charge your smartphone if you have no other options. Although phone manufacturers recommend charging your phone’s battery using the electrical adapter and cable that came with the device, sometimes you may forget your charging cable and need another solution fast. Just be careful with this option.
One thing to note is that the phone’s battery won’t charge as fast as it does with a standard power adapter. You’ll also need to turn the TV on to charge the phone via the USB port. Connect the USB cable to the phone and plug the other end into the television. Once you turn the tv on, the device will start charging. You can also implement this technique with other devices like Playstations and DirectTV boxes.
8. Streaming Purposes
A TV’s USB port can also be used as a streaming channel for devices like Chromecast, Roku, and the Amazon Fire TV Stick. The fire stick plugs into an HDMI TV via a USB port and connects through Wi-FI. The fire stick comes with a Bluetooth remote that allows you to set up and sign in to your Amazon account.
You can access all your content through the fire stick. After logging in, you can enjoy watching all the movies and music purchased on your Amazon account on your TV. The streaming device also allows you to open apps like Netflix and watch trending shows. Furthermore, you can view photos uploaded to your Amazon Cloud service.
9. Internet Hotspot
You can enable a hotspot on your smartphone or tablet and connect through USB on some smart TVs.
- Switch on tethering in Settings > Connections > Tethering.
- Connect to the same phone on your smart TV.
- Either use cable, Wi-Fi, or mirroring.
Hotspotting really depends on your smart devices though, and whether the USB cable is USB-C and allows video passthrough. This option may not make sense since you could just mirror your screen or create a wireless hotspot and connect your smart TV to your phone.
This video also explains this section in detail for Android phones, but you can do the same with iPhones as well:

How to Use the TV’s USB Port
Now that you know some of the reasons why your TV comes fitted with a USB port, it’s time to find out how to use that connection. Here is a simple guide and tips to get started.
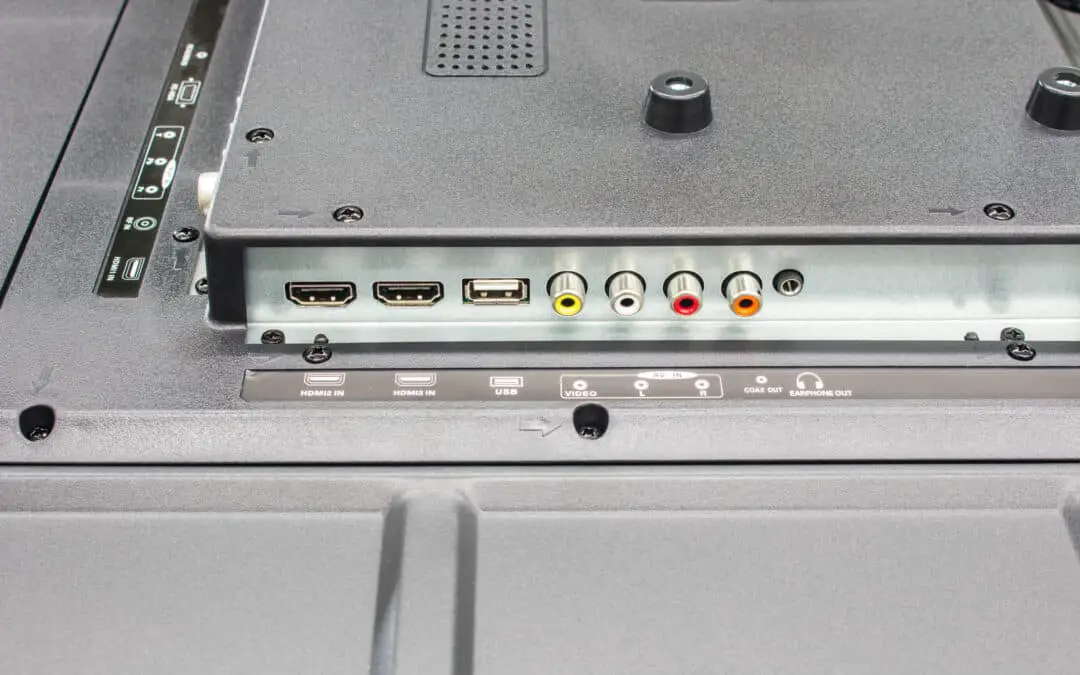
Check Your TV for a USB Port
The first step is to inspect your TV for a USB port physically. Some old television sets don’t have this port, but modern flat-screen TVs are fitted with the port on the side or under the TV. If you are unsure about the port’s location and think your TV should have one, you can consult the TV manufacturer.
TV manufacturers like Samsung, Philips, and Sony have dedicated pages on their websites that provide content on playing content through the USB. That includes possible problems you may encounter and supported files.
Find Out the Supported USB Format
Once you’ve determined that your TV has a USB port, it’s time to find out if your TV supports your drive’s format. The best way to do this is to check the manufacturer’s website for the supported systems. A good example is Samsung sets support NTFS and exFAT systems, while Philips TVs support DOS or FAT format.
Plug the USB Drive Into the Port
After determining that you have a USB format and finding out the supported USB format, the final step is to plug the USB drive into the port. A pop-up notification will appear with something like browse USB or browse media. Sometimes you may need to press the Source button on the remote and click on the USB device.
At this point, you can browse your USB drive like you would on a laptop or PC. Select the file you want to play. A file that won’t play could indicate a format issue or a drive problem.
Tips to Get the Most Out of Your TV USB Port
A TV USB port can be used to power devices, transfer files, update the firmware, and connect other accessories. However, for the TV USB port to work effectively, you need to understand a few things.
Here are a few tips to help you get more out of your USB port.
Avoid Using Heavy Hard Disks on Your TV USB Port
Some people make the mistake of suspending massive hard disks from the TV USB port. Unfortunately, this weight can rip off the whole connector. The best thing to do is to get an extension cable to reduce this weight. This especially applies to people who have their TV sets mounted on the wall.
Understand That You Can Only Use the Number of Ports on the TV
A common assumption that can be misleading is that you can connect multiple devices on one port using a USB hub. The fact is that you can only use one port at a time. If a TV comes with 2 USB ports, you can only connect to the two ports, even when using a smart TV. Computers are the only devices that allow you to plug several devices from one port.
Never Pull USB Devices in Use
Avoid the mistake of pulling USB devices that are in use from your TV. The problem with pulling the device could lead to corrupted data or even damage the USB drive. You need to use the same procedure of ejecting a flash drive from a computer on your TV.
For USB removal, press Source on the TV remote and select the USB device you need to remove. Go to Tools at the top of the screen and select a Disconnect USB device from the given list to safely remove the device.
On Android TV, you’ll need to go to the Home Screen and scroll down to Settings. Under Device, select storage and reset. Choose your USB drive and eject.
Avoid Formatting Devices From Your TV
Never format USB devices or flash drives from your TV, which means they may never read on a computer. The best way to format a USB device is through a computer. Save all the files you need as formatting the device could delete all content.
To format a drive, do the following steps:
- Connect it to a PC or a laptop.
- Click on My Computer.
- Once you are on the My Computer window, right-click on the drive icon, where the USB device will appear.
- Click format from the menu. In the Format device name window, go to the file system and click on the drop-down arrow.
- Choose the format you’d like for the device and click the start button.
- Click OK if you encounter a warning message.
- You’ll get a complete format message; click OK to proceed.
- Close the format device name window and click the X at the top right to close the My Computer Window.
When using a macOS device, do the following steps:
- Connect the USB drive to the computer and open DiskUtility.
- Select the USB device from the left panel and click to change to the Erase tab.
- Once at the Volume Format box, click the MS-DOS file system and select the erase button. You’ll be prompted to a confirmation dialog.
- Click the erase button to confirm.
- Close the Disk Utility and Window.
Charging the TV Using a USB Port Is Never a Good Idea
Although we highlighted one of the USB ports can be used as a charging station, it’s not always a good idea to charge your smartphone on this port. Charging can draw more current from the port, which means there are high chances of damaging the TV’s mainboard. Moreover, the phone will charge slowly as the TV USB port only produces 500mA. Phones usually charge at 1A for normal speed and 2A for fast charging.
Simple Fixes for a USB Port on TV That Won’t Work
One of the many questions people have is, why is my USB not working on my TV? Below are some reasons why the USB port on your TV may not be working and some quick fixes.
Outdated Firmware
One reason that causes USB devices to not function on a TV is outdated firmware. You need to ensure you have installed the latest firmware on the TV. Fortunately, most TV manufacturers allow you to download the newest firmware from their website.
Burnt Out Ports
Another possible reason why the USB device may not work on your TV is burnt out ports. Sometimes the ports could be filled with dust and other debris, adding to the connection problem. You need to check the USB port condition on your TV to determine if you’re dealing with burnt out ports or dust buildup.
Using the Wrong USB Cable
Using the wrong USB cable could be the other reason why your TV USB port is not detecting your USB device. Most people are quick to blame a faulty USB TV port when the problem is a low-quality USB cable. The problem with using the wrong cable is that it not only fails to show the files on your device, but it could also damage the TV ports.
Most USB cables sold at convenience stores are cheap and of low quality. When charging your phone using the TV USB port, it may take longer to charge fully. In some cases, the wrong USB cable could also damage your phone, which becomes an extra expense. To resolve this issue, you can use a better quality USB cable that won’t fail you when you need it the most.
Wrong File Format
Most TV brands do not support the NTFS file system as a default system with most USB drives. The reason why your TV’s USB port may not be recognizing your USB device is that it’s in the wrong format.
In this case, you need to format your USB file in exFAT or FAT32 as these formats are compatible with most TV models. However, before you format the device, make sure to save all the files somewhere on your computer if you need them later.
Formatting is simple as all you need is to plug the drive onto a computer with a windows operating system. The drive will be automatically detected, right-click on it and click format. Click on the file system and choose the format you need, which could be exFAT or FAT32. Click on start to initiate formatting. The FAT32 format limits the size of files to 4GB and below.
If your TV has only two ports and you have a USB 3.0 drive, it won’t work because of your television’s power output. Old TV models won’t detect a USB drive automatically, and you may have to open it manually by going to the source on the TV and choosing the USB device.
Using a Corrupt USB Device
If you’ve tried to plug in a flash drive on a TV and gotten an error message, that could indicate an unstable drive or a corrupted drive. That often happens with low quality or damaged drives. Sometimes your TV may need firmware updates, or the recent updates may not be compatible with the USB drive.
The only way to resolve this issue is by uninstalling and reconnecting the USB drive or settling firmware-related problems. In some cases, you need to get a high-quality drive as you could be dealing with an incompatibility issue.
Is There an Alternative Approach When the TV Doesn’t Have a USB Port?
There is an alternative approach if your TV doesn’t come with a USB port. You can use the HDMI port on your TV to stream content from gaming consoles and media devices like the Amazon Firestick. A media player app can be used to play content from most modern gaming consoles like Playstation and Xbox.
Final Thoughts
Modern TV sets come with USB ports that allow you to play or transfer files, charge your smartphone, power devices like Chromecast or Amazon Fire Stick, and connect other TV accessories like backlights. Hopefully, you now understand why a USB drive may not work and some fixes to help you resolve any issues you encounter.